


How to Maintain a Sharp Beard Lineup at Home
Table of Contents
Why a Sharp Beard Lineup Changes Your Whole Look
Beard Lineup Tools You Actually Need
Trimmer Setup and Blade Care
Prep the Beard and Skin Before You Trim
How to Get a Crisp Beard Line: Step by Step
Setting the Cheek Line
Keeping Both Sides Symmetrical
How to Clean Up a Beard Neckline
Find the neckline with two reference points
Adjust for jaw and growth pattern
Trim the neckline in the right order
If you cut the neckline too high
How Often to Line Up a Beard
Fixing Mistakes and Handling Stray Hairs
Conclusion
Frequently Asked Questions
Last Updated: October 19, 2026
Why a Sharp Beard Lineup Changes Your Whole Look
A sharp beard lineup is the difference between looking styled and looking like you skipped a month of grooming. The edges of your beard frame your face, and clean lines sharpen your jaw, define your cheekbones, and make a patchy beard read as intentional. At KOZMIC BARBERSHOP LLC, we utilize our expertise in classic straight-razor finishes, and the lesson is always the same: the outline does the heavy lifting.
Most men focus on length. They buy oils, brushes, and balms, then ignore the two lines that decide everything. A crisp cheek line and a clean neckline create contrast between smooth skin and facial hair. That contrast is what people notice first.
Below, we break down the tools, prep, and step-by-step method for keeping your beard lineup sharp between barber visits. We also cover the mistakes that wreck a good outline and how to recover from them.
Beard Lineup Tools You Actually Need
You need four tools for at-home line maintenance: a trimmer with a sharp blade, a beard comb, a hand mirror, and a second mirror you can see from two angles. That is it.
Skip the multi-tool kits with twelve attachments. Most of those guards never touch your face. Here is what earns its place on the counter:
A cordless trimmer with a fine-tooth T-blade for close, precise edges
A beard comb to lift hair and reveal uneven areas
A hand mirror for checking symmetry and the neckline
A main mirror mounted at eye level so you are not craning your neck
A small brush for sweeping away loose hair as you work
Trimmer Setup and Blade Care
A dull blade pulls hair instead of cutting it. That tugging is how you end up with a jagged edge and irritated skin.
Follow this routine before every trim:
Check the blade for hair buildup and brush it out.
Oil the blade with a drop of trimmer oil and run it for a few seconds.
Set your guard. Use a longer guard for bulk work and go guard-free only for the edge itself.
Test the trimmer on your forearm first. If it snags, stop and clean it again.
Pro Tip Trim on dry hair, not wet. Wet beard hair stretches and lies flat, so it springs back after you cut and leaves you with an uneven line. Save the wash for after.
Prep the Beard and Skin Before You Trim
Prep takes five minutes and saves you from a lopsided lineup. Start by washing your beard with a beard wash to remove oil and dead skin. Pat it dry completely.
Bthebarber
Next, comb the hair in the direction it grows. This does two things: it softens the beard hair and it shows you where the natural edges fall. You will spot stray hairs and uneven areas immediately.
A common mistake is trimming right out of the shower. Wet hair hides its true length. Give it ten minutes to dry, then comb again before you touch the trimmer.
Watch Out Never trim over dry, flaky skin without washing first. Dead skin catches in the blade, and dragging a trimmer across it can cause razor burn and ingrown hairs along the edge.
How to Get a Crisp Beard Line: Step by Step
A crisp beard line comes from trimming the edges last, not first. Shape the bulk, comb everything into place, then define the outline with slow, short strokes.
Here is the sequence we use:
Set the bulk. Trim the overall length with a guard to your target beard length.
Comb and map. Comb the beard flat and study where the natural cheek line and neckline sit.
Mark the cheek line. Follow the curve of your jaw up toward the sideburn.
Clean the neckline. Find the point where your head meets your neck.
Check symmetry. Use the hand mirror to compare both sides.
Freshen the edges. Make short, downward strokes along the outline to remove stray hairs.

Setting the Cheek Line
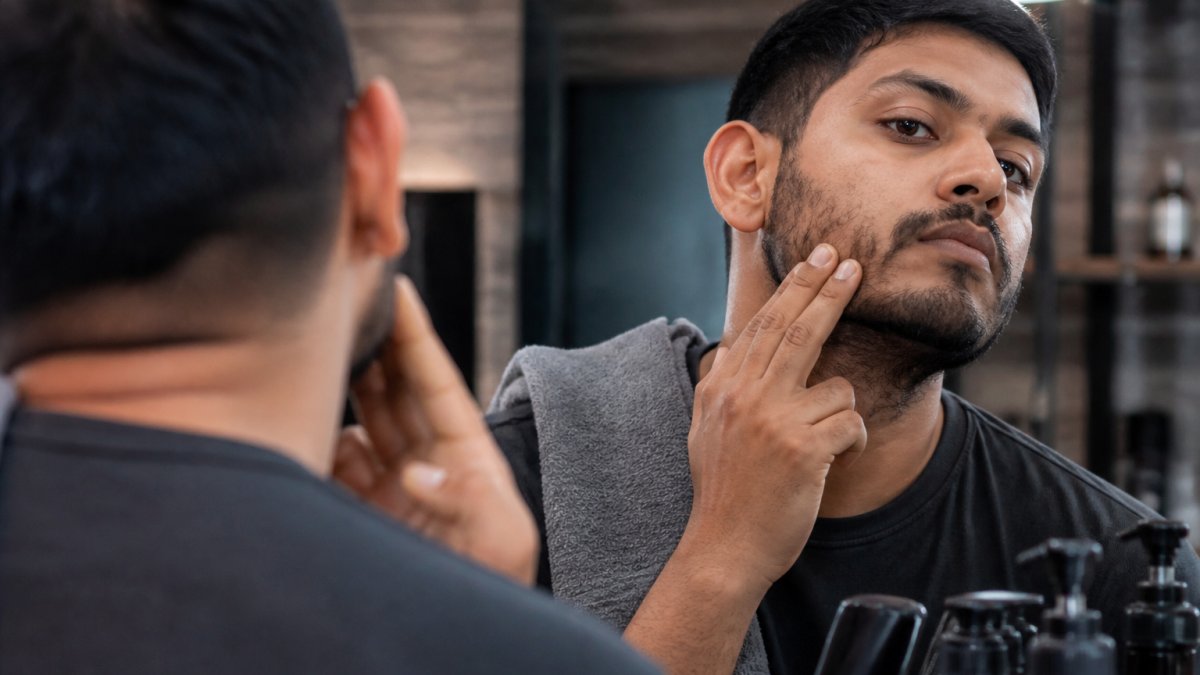
The cheek line should follow your natural growth pattern, not a ruler. A good rule: place two fingers above your Adam's apple, then trace upward toward the top of your ear. That diagonal is your guide.
For a round face, keep the cheek line higher to add length. For a long face, let it sit lower and softer. Never carve a hard, straight line unless your growth supports it.
Keeping Both Sides Symmetrical
Symmetry is where most at-home lineups fail. Your dominant hand pulls the trimmer at a slightly different angle on each side.
Use this method:
Trim one side, then step back and look straight into the main mirror.
Turn your head slowly left and right to compare the edges.
Use the hand mirror to check the side you cannot see well.
Trim the weaker side first, then match it.
Key Takeaway Match your second side to your first side, never the other way around. If you chase a bad edge with more trimming, you lose the line entirely.
How to Clean Up a Beard Neckline
The neckline decides whether your beard looks deliberate or neglected. Set it too high and you get a chinstrap that fights your jaw. Set it too low and the beard blends into your neck and reads as unkempt. The goal is a gentle curve that follows the natural crease under your jaw, not a straight line across the throat.
Find the neckline with two reference points
Use two landmarks instead of guessing:
The crease test. Tilt your head back and look in the mirror. The horizontal fold where your head meets your neck is your upper limit. The neckline should sit at or just below that fold, never above it.
The two-finger rule. Place two fingers flat against your Adam's apple and measure upward. The top of your fingers marks roughly where the center of the neckline should sit. This is a starting point, not a law, adjust for your jaw and growth.
From those two points, shape a shallow U. The center of the U sits at the two-finger mark; the sides rise gently toward the jaw and meet the beard line behind the jawbone. A U follows the jaw and flatters almost every face. A straight horizontal line cuts across the throat and looks pasted on.
Adjust for jaw and growth pattern
Strong, square jaw: Keep the neckline slightly higher and tighter to the jaw so the jawline stays the focal point.
Softer or rounder jaw: Let the neckline sit a touch lower and keep the U wide, which creates the illusion of a stronger jaw.
Double chin or loose skin under the jaw: Keep the line at the crease and avoid pushing it high. A high line exposes the skin fold and draws attention to it.
Sparse neck growth: Follow the densest growth and keep the line low. A low, clean line on a sparse neck looks far better than a high line with visible gaps.
Trim the neckline in the right order
Comb the neck hair downward so it lies flat and its true length shows.
Mark the U with the edge of a comb or your finger before the trimmer touches skin.
Trim below the line first with a guard, removing bulk.
Go guard-free only for the final edge, using short strokes from the center of the U outward toward each side.
Check both sides in the hand mirror before you finish. The two ends of the U should meet the beard at the same height behind the jaw.
Watch Out Do not shave the neckline with a razor against the grain on the first pass. Work with the grain first, then a light against-the-grain pass only if your skin tolerates it. Going straight to against-the-grain on sensitive neck skin is a common cause of razor burn and ingrown hairs right along the edge.
If you cut the neckline too high
Stop trimming immediately. A high neckline cannot be fixed by cutting more, it can only be grown back. Let the area grow for seven to ten days, then blend the new growth into the existing line with light, downward strokes rather than trying to re-carve a hard edge. If the line is badly off, a barber can often reshape it into a lower, cleaner U in a single visit. The same rule applies here as on the cheeks: never chase a bad edge on one side by cutting the other side to match.
How Often to Line Up a Beard
Most men should line up a beard every one to two weeks. That schedule keeps edges sharp without over-trimming. If your facial hair grows fast, check the outline weekly and touch up stray hairs as needed.
Between appointments, a quick pass with a trimmer keeps the beard looking well-trimmed. Book a professional lineup every four to six weeks to reset the shape.
Growth Speed | Touch-Up Frequency | Professional Reset |
Slow | Every 2-3 weeks | Every 6 weeks |
Average | Every 1-2 weeks | Every 4-6 weeks |
Fast | Weekly | Every 3-4 weeks |
Fixing Mistakes and Handling Stray Hairs
Over-trimmed a cheek line? Stop cutting. Let the area grow for a week or two, then blend the edge back in with light strokes. A barber can often reshape a bad line into a cleaner, lower one.
For stray hairs, use the trimmer guard-free with short downward strokes. Never pluck edge hairs, since plucking can cause ingrown hairs and small bald patches along the outline.
Watch Out If you cut a notch into your cheek line, do not try to even it out by cutting the other side. You will end up with two bad edges. Let it grow and book a professional lineup to reset the shape.
Conclusion
A sharp beard lineup takes a sharp blade, dry hair, and a slow hand. Master the cheek line, the neckline, and symmetry, and your beard will look intentional every day, not just on barber day.
If you want the outline reset by a professional, KOZMIC BARBERSHOP LLC offers precision beard shaping with classic straight-razor finishes. Our barbers bring years of experience to every lineup, so you leave with clean edges and a shape that fits your face. Book online and let us sharpen the details.
Frequently Asked Questions
How high should my beard cheek line be?
Set the cheek line just above the natural curve where your beard grows in, following the jaw's upward angle toward the ear. A safe rule is two finger-widths above the top of your beard growth at the cheekbone. Going higher creates an artificial look and leaves less to work with next time. Use a comb to push hair up, then trim only what sits clearly above the natural line. If you are unsure, take off less and refine over a few days.
How often should you line up a beard?
Most men need a light lineup every 5 to 10 days, depending on how fast facial hair grows. Fast growers may see stray hairs along the cheek and neck within a week, while slower growth can stretch to two weeks. A full professional shape every 3 to 4 weeks keeps the overall structure intact. Between appointments, a quick pass with a trimmer on the cheek line and neckline is enough to keep edges looking clean without removing length.
What tools do you need to maintain a beard lineup?
You need four things: a trimmer with a sharp, narrow blade for detail work, a beard comb to lift and align hair, a hand mirror to check angles you cannot see straight on, and a guard for the neckline if you want a consistent length. Add a small brush for cleaning blades and a beard wash for prep. A trimmer with adjustable zero-gap settings gives cleaner edges than a clipper built for head hair, which tends to leave a softer line.
How can you avoid pushing your beard line too far back?
Trim in small passes and stop before you think you need to. Start at the natural edge and remove only hairs that sit clearly outside it. Check the line from three angles using a hand mirror before going further. Once hair is cut, it takes weeks to grow back, so a conservative first pass protects the shape. If a line looks uneven, correct the longer side rather than chasing the shorter one, which is how lines creep backward over time.
Book Online
Comments